
Organisation accounts
Use Your Organisation's Accounts to manage user access to specific accounts owned by your organisation.
See Partner Accounts to view accounts assigned by delegated access.
View accounts
Go to Administration > Account Access > Your Organisation's Accounts.
The list shows all the accounts you have permission to manage.
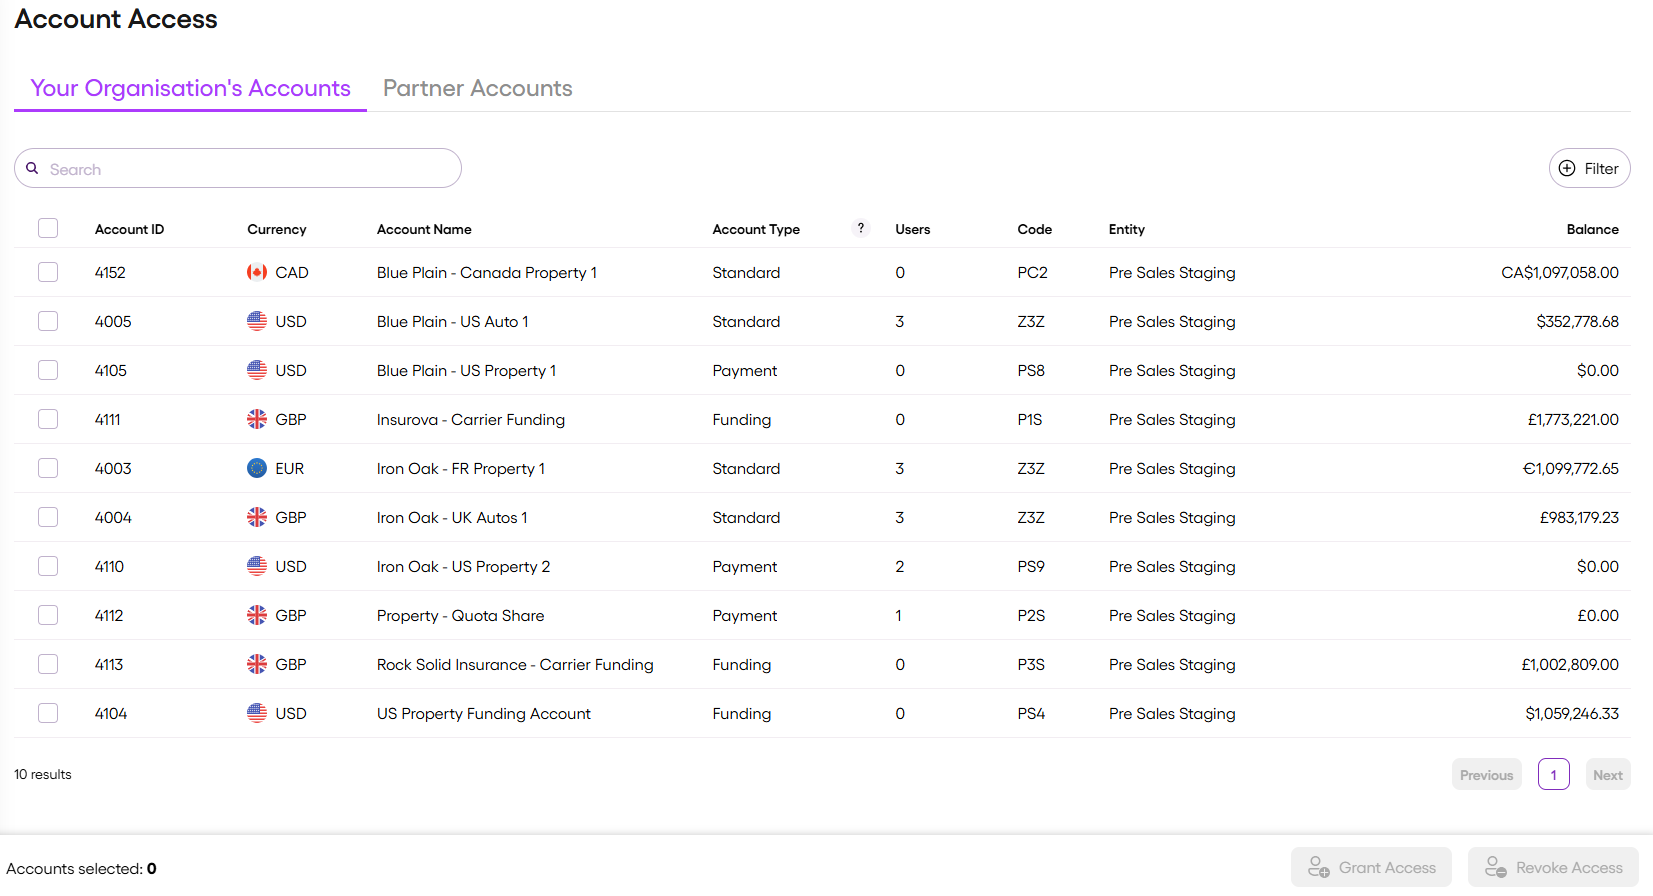
Use Search and Filter above the Accounts list to find and sort the available accounts.
| Column | Description |
|---|---|
| Account Id | The unique identifier for the account. |
| Currency | The account currency. |
| Account Name | The name of the account. |
| Account Type | The type of account, one of: Standard, Funding, or Payment. For more information, see Account types. |
| Users | The number of users who currently have access to the account. |
| Code | The internal account classification or reference code. |
| Entity | An operational unit within an organisation. For more information, see Organisations and entities. |
| Balance | The current available balance of the account. |
Assign users to accounts
- In the account access table, use the check boxes to select one or more accounts.
If a selected account has a legacy pairing with one or more accounts, a warning appears. Select Accept & Continue to grant or revoke access for the selected account and all accounts paired with it. - Select Grant access to open the user list.
- Select the users who should have access to those accounts.
You can search for users by name or email address.
- Select Grant Access.
- Confirm your selection.
Users gain access to the selected accounts. A confirmation banner appears when the access is granted.
The user list:
- Shows users with no or partial access to the selected accounts
- Displays a Current access column showing how many of the selected accounts each user can already access
- Excludes users who already have access to all selected accounts
Remove users from accounts
- In the account access table, use the check boxes to select one or more accounts.
- Select Revoke Access (bottom right) to view the user list.
- Select users.
- Select Revoke access.
- Confirm your selection.
Users lose access to the selected accounts. A confirmation banner appears when the access is revoked.
The user list:
- Shows users with full or partial access to the selected accounts
- Displays a Current access column showing how many of the selected accounts each user can already access
- Excludes users with no access to the selected accounts
Updated 3 months ago