Create a Programme
Use a Programme to to define the options available for payment administrators and control how recipients receive payments, including the source accounts, payment methods, branding, and verification settings.
Get Started
-
On the Programmes page, select New Programme.

Configuring a Programme takes multiple steps. You can return to any completed step using the navigation at the top of the screen.
You can save the Programme as a draft and return to it later.
Define Programme
Set the core Programme details, choose payout methods, define how long a payment link remains active, and add optional messaging.
-
Enter a Programme name and Description.
-
Select one or more Payment Methods available to the payment administrator when making a payment: Bank account, eCheck, Card, Postal cheque. They will choose which of the methods in the programme are offered for this payment.
-
Select the number of days that the payment link remains active to the recipient before it expires.
-
Turn on Include Payee Acceptance Narrative to display a legal disclaimer that recipients must accept in order to receive their payment.
You can customise the disclaimer text if required. This is how it appears to recipients: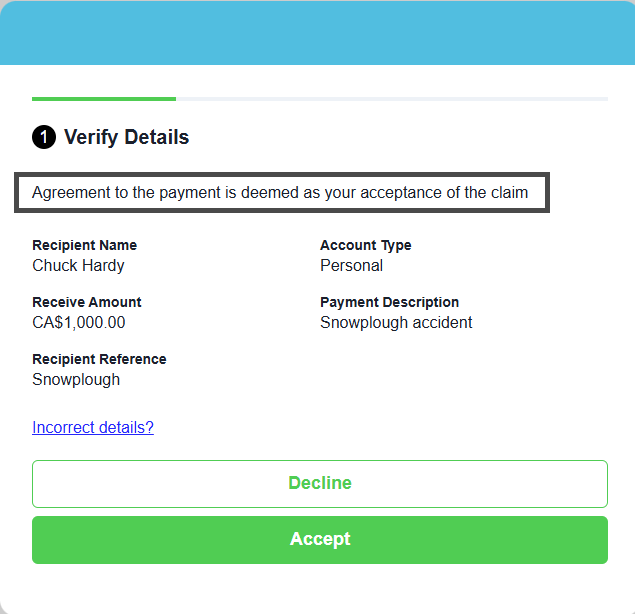
-
Select Next to continue.
Eligible accounts
Add the source accounts that the payment administrator can use for payments associated with this Programme.
-
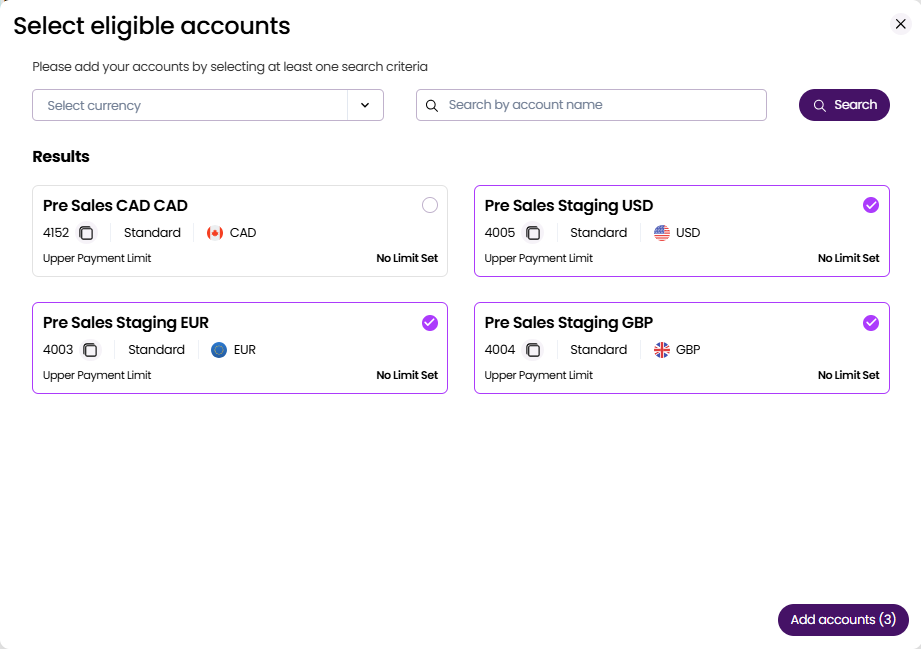
Select Search accounts.
-
Select one or more accounts for the Programme.
-
Select Add accounts.
-
Select Next.
Notifications
Control how recipients are notified about their payment.
- Enable payment invitation email.
Turn on Call to action email notifications to have Vitesse send recipients a branded email with a link to claim their payment.If you turn this off, no email is sent by Vitesse and your company is responsible for sharing the payment link with the recipient.
- Set reminders.
Configure email or SMS reminders if a recipient hasn't submitted their payment details.
You can schedule reminders for up to 6 days after the initial invitation. - Enable success notifications.
Turn on notifications to alert recipients when the system receives their payment details and when the payment is processed.This is particularly useful in the US, where delivery methods like checks may take longer.
Establishing trust
Trust Methods help recipients confirm that a payment link is genuine. The payment administrator will enter the selected Trust Method values before submitting a payment.
-
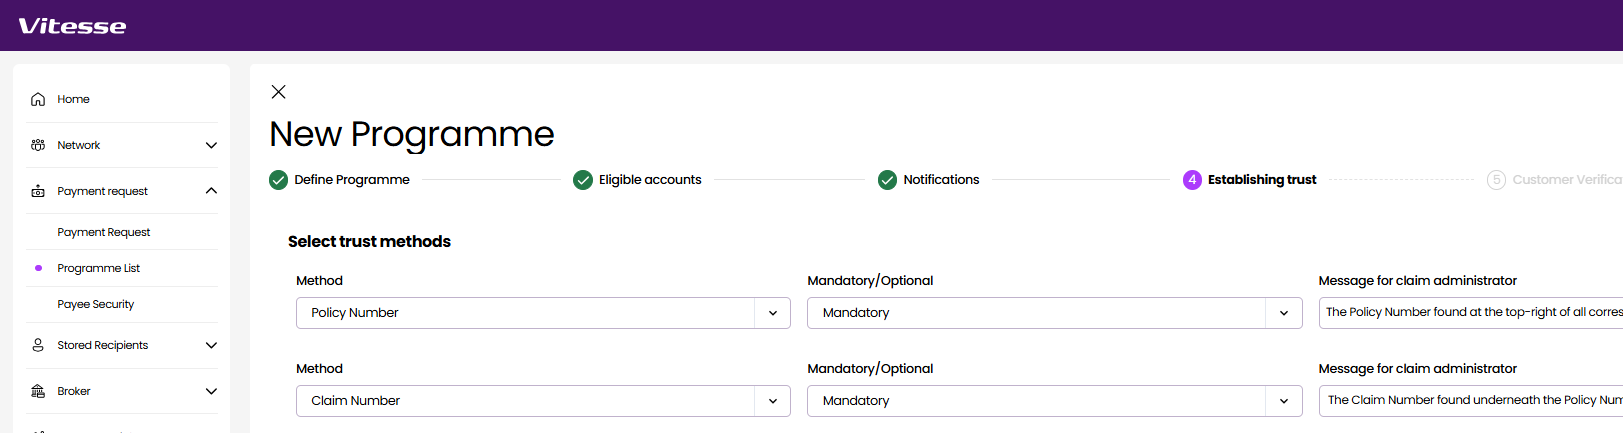
Select one or more Trust Methods to include in the payment communication.
-
For each method, select whether it’s Mandatory or Optional to complete.
Make at least one method mandatory. -
For each method, enter a corresponding Message for claim administrator label description, to assist users when they make a single payment.
Customer Verification
Configure how recipients will verify their identity when they open the payment link.
-
Select one or more Verification methods:
- SMS – The recipient must enter a one-time 6-digit code that they receive by text message
- Policy Number – The recipient must enter the unique policy identifier relating to the payment
If you used Policy Number as a Trust Method on outgoing communication, you must not use it as a Verification Method.
- Passphrase – The recipient must enter a previously communicated passphrase
-
If you select more than one method, set one as the default.
The verification method you choose controls the security screen the recipient sees after accessing the payment link.
Branding
Customise how the payment experience appears to recipients, including branding, colours, and contact details.
-
Enter the Name of insurer.
The company name that appears in communication/notification emails and on the online payment form. -
Enter the Name of claims administrator.
The point of contact person or team name for the payment. -
Enter the absolute Logo URL to display the company's logo image in all communication.
For example: https://www.example.co.uk/assets/images/logo.png
For more information, see About the logo image. -
Set the Primary Colour.
This is used for the payment link button in Call to action notification emails, and for buttons, progress bars, and selections on the payment form. -
Set the Header Colour.
This is used for the top banner in Call to action notification emails, and for headers on the payment form. -
Enter the Insurer Contact details, including phone, email, website and a guidance message for additional information (such as office opening hours).
These details appear in Call to action notification emails and in the contact links shown on the payment form, for example: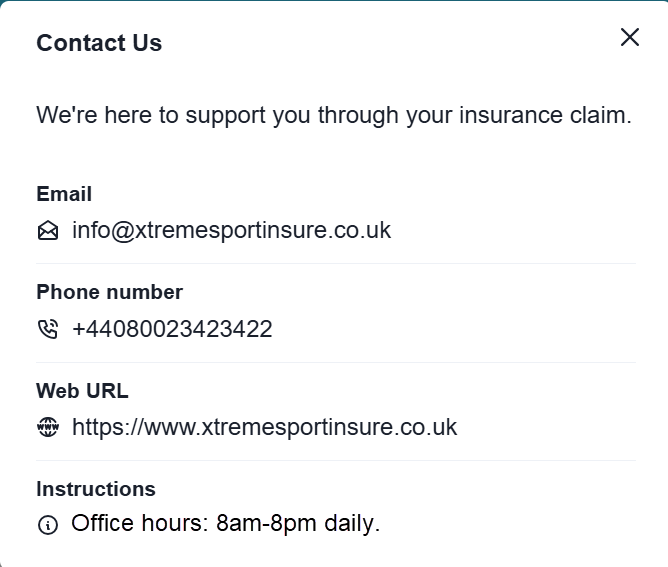
-
Select Next to review the details.
-
Select Done to return to the Programmes list.
The Programme is active and ready to use.
Logo image recommendations
Logos take up approximately 60% of the header height on the secure online payment form. We recommend the following:
- Use PNG format, best for logos with transparency or clean, sharp lines
- For crisp clarity on high resolution screens, use a high quality image that is 76px-114px high
- Keep the aspect ratio between 2:1 and 5:1 (width:height)
- Avoid internal padding
- Avoid logos with small text
Check that the text is legible when the logo maximum height is 38px.
Updated 2 months ago